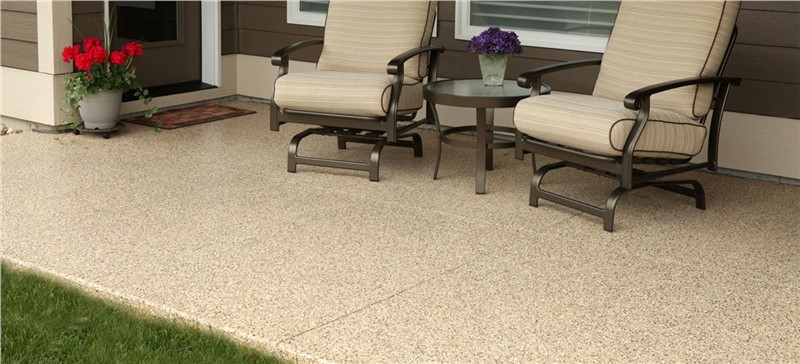
You can hire a professional to resurface your concrete patio for you, but homeowners should know that doing it yourself is also an option. Although resurfacing your own concrete is a bit of a labor-intensive task, it shouldn't take you more than a couple of hours to complete. Homeowners should also be aware that resurfacing concrete is an important part of your maintenance routine, and it will need to be re-done at least once every year or more to keep the area looking its best.
By replacing their concrete patio, Kansas City homeowners can eliminate the need for time-consuming and expensive yearly maintenance. In any case, we're here to walk you through the process of resurfacing for homeowners that count with concrete patios and are looking for instructions on how to do it themselves.
Step One: Gathering Your Supplies
To get started with your DIY resurfacing project, a trip to the home improvement store is in order. You'll need to gather quite a few supplies to work with, so it's a good idea to shop around to find the best deals on the following items:
- Resurfacing Product for Repairing Concrete and Cement (Quikrete or Sakrete)
- A Hand Trowel for Shaping and Leveling Concrete
- A Wheelbarrow for Mixing and Moving the Blended Concrete Resurfacer
- A Mixing Tool (such as a stick or a shovel)
- Duct Tape to Cover and Protect Expansion Joints
- A Garden Hose and Water Supply
- Gloves, Safety Goggles, Protective Clothing, and a Protective Mask
- Safety mask and goggles
- A Power Washer (note: if you don't own a power washer, you can rent one)
Step Two: Check the Forecast
Make sure to check the weather forecast before beginning this project. This process can be ruined by wet weather, so make sure that there-s no chance of rain;and that the day is dry and preferably sunny. Also, keep in mind that the colder the weather, the longer it will take for the concrete to dry.
Step Three: Resurface the Concrete Areas
Remove dust, debris, and impurities from the surface of your concrete patio area with the power washer. It's important that these areas are wet in order for the resurfacer to stick to the pavement, so make sure that this step is performed right before the application of the concrete to the area.
Once you've power washed the area, lay down protective strips of duct tape over the expansion joints, also known as control or contraction joints. These areas should remain intact, and the tape will help you to identify these areas and keep them from safe from the process.
Next, use your mixing tool to mix the concrete in the wheelbarrow or another container by adding in water until it reaches the right consistency. You'll then spread the concrete onto the patio with the hand trowel evenly.
Step Four: Wait for the Concrete to Dry
For the next six to eight hours, you'll want to make sure that the concrete area is left completely untouched as it dries. You might want to keep any pets in the house or garage to prevent them from walking over the area and leaving tracks in the concrete. The amount of time it takes to dry will also depend on the weather, where the colder the temperatures are, the longer it will take.
Upgrade to Polyurea and Epoxy Patio Coatings
If you're tired of resurfacing your concrete patio and want to upgrade your patio with better, more advanced materials, our team at ETEK Custom Coatings can help. Our polyurea and epoxy coatings are strong, low-maintenance, and gorgeous and can bring your yard or outdoor area to new heights.
To find out more, give us a call to speak with someone from our team at ETEK Custom Coatings today. You can also fill out our online form to request a free, in-home consultation and pricing estimate.
Tags
Subscribe to Etek Custom Coatings's Blog
Comments